A happy birthday to you if today happens to be the day you came into the world xx years ago! If it has already passed, still, happy birthday, gal/pal!
So...what was your birthday cake for this year? Did you have a pro make it? Or did you DIY?
Because I did. 😎
(This is going to be a long post! You've been warned!)
25th of October, I turned twenty-freaking-four years old. Do I feel old? Yes and no. I think I asked the same question last year; if I already have my life planned out. Bud, it's only been a year. Some great things can take a lot of time to come together.
Speaking of coming together!
This 2-layer 8-inch funfetti cake from BethCakes was baked, cooled, double cling wrapped and stored in the freezer on a Sunday and leveled, frosted, decorated and eaten on a Tuesday.
A hot, hot Tuesday it was. Oh, dear.
Let's jump right in and talk about the cake layers first.
The recipe is pretty simple, really. Ingredients are all basic baking stuff such as 4 large egg whites, to be specific.
"What would I do with the 4 egg yolks then?!"
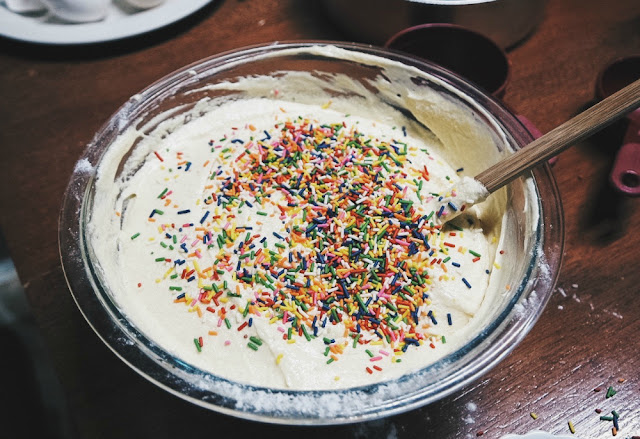
SoOoooOooOOO...I decided to not separate the whites from the yolks and use whole eggs instead (#StubbornScorpioProblems). And my butter, again, became too soft. I'm telling you our kitchen is really just a huge oven! So what happened to the batter? It was too thin in the sense that if I tilted the mixing bowl, it would've spilled like it's liquid. Was it because I used whole eggs instead of just the whites? And was it because my butter was too soft? Maybe. Maybe not.
Now, baking time. My oven is a tiny one. Tiny-can-only-cram-one-9"-pan-inside tiny. So the cake layers were baked in two batches. Baking time stated in the recipe is 25 to 28 minutes. I set the alarm to 25 minutes for the first cake layer. And since you know that I'm an anxious baker, I would occasionally peek through the oven to see how the cake was doing.
It wasn't even near 25 minutes yet and THE TOP WAS ALREADY TOASTY BROWN.
"Face screaming in fear" is this emoji > 😱 . Accurate description of myself in that situation. I quickly ripped a piece of aluminum foil and covered the top with it. The first layer took a total of 33 minutes to bake with minimal moist crumbs stuck to the toothpick when tested. Second layer, took 31 minutes to bake. Whew. Finally. When both layers have cooled completely, I then double wrapped both layers separately in cling wrap and in the freezer they went (because there wasn't any space in the fridge)! Here's a great read from The Kitchn about storing cakes!
I did level the tops and sides of both layers and did a fantastic job at it. I mean please look at the picture with the bottom layer only and see how uneven the cakes are! Oops!
So that hot, hot Tuesday arrived (my birthday!!!), and before I made the buttercream/frosting, I took the cake layers out of the freezer. If you're wondering if they froze, nope, they didn't. I was actually short on powdered sugar by 1/4 cup? But despite that the recipe still worked for me. Oh, and I didn't use the two tablespoons of milk because the consistency was already to my liking. Firm but spreadable. I also used chocolate flavoring instead of vanilla!
Now, the design/decoration. If you go on Pinterest, you've most probably seen these "watercolor cakes", right? Well, I decided to give the technique a go because it seemed easy! And it really is!
Please, please refer to Tessa's post on her blog for a clear, in-depth explanation of how to do the watercolor frosting technique!
I used blue, violet and red liquid food color because those are the colors I already have. Plus, liquid is way cheaper than gel/paste food dyes! But I'm planning on purchasing a few colors in the future knowing how easy it is to make watercolor cakes!
Oh, and please, don't be too harsh on how my frosting isn't smooth looking. My excuses? I don't own a cake turntable nor an icing smoother/bench scraper and again, it was too hot that day.
My solution? Sprinkles. But don't go too wild or else you might cover your beautiful watercolor!
And I didn't get the memo about how taking blog pictures of food at gatherings can be... hectic. I mean I wasn't even able to snap a pic of my own slice!
Since this is everyone's beloved vanilla butter cake and flavored buttercream frosting, which could look meh as is (let's be real), that's why adding sprinkles (thus making it funfetti!) and doing the watercolor frosting thing is a must! I mean, no hate on plain, tame cakes but since you're already at it, why not put some color in, right?
Verdict? Like I said, it's your typical butter cake, which if you love butter cakes, is delish. If you have a sweet tooth, the frosting is for you! But I think I'm going to have to say that the watercolor effect is the star. I hope you give the technique a go! It's super easy! Listen to this Anastasia song where Vlad and Dimitri were teaching Anja about the ways of royalty and that's exactly what I want to tell you: you can do it, too!
Til the next post!


No comments:
Post a Comment